Code signing certificate for indie developers
A walkthrough from buying a Certum’s code signing certificate to sign an app with it

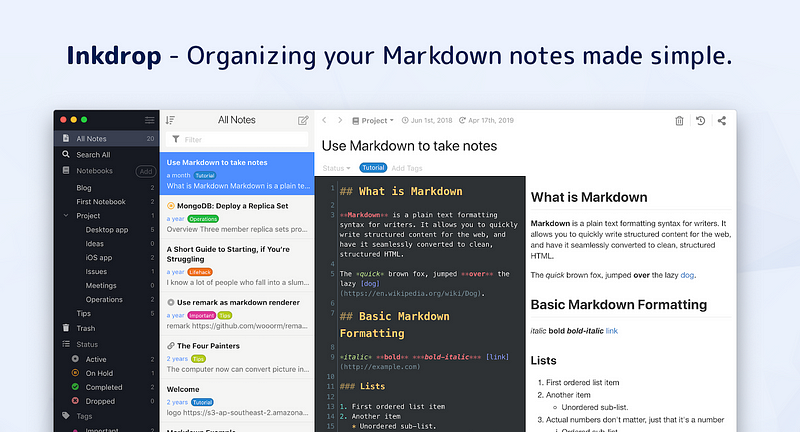
Hi, it’s Takuya. I’m an indie developer, running a profitable SaaS called Inkdrop. At the moment with the current business scale, I’ve been choosing to be self-employed rather than owning a company because I’d like to keep my life simple for now. My app, Inkdrop, is a Markdown note-taking app that runs on macOS, Windows, Linux, iOS, and Android. These days, operating systems have a feature to protect users from malicious software. On macOS, you have to notarize your app to distribute on the internet. It’s quite easy because Apple basically provides what you need. On the other hand, on Windows, you have to buy a code signing certificate from a third-party company to sign your app yourself if you distribute it outside Microsoft Store. If you didn’t sign it, you will get the Windows SmartScreen warning like this:
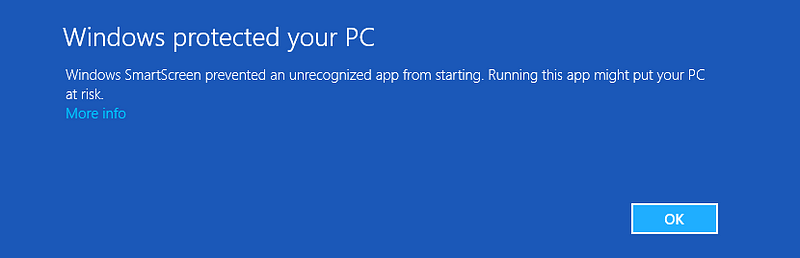
This is annoying. The warning will disappear when you get enough volume of downloads even without the code signing. But, it appears again when you released a new version. It would significantly affect the conversion rate of your business. So, I’ve bought a code signing certificate and successfully signed it:
In this article, I’ll explain the steps from buying a code signing certificate to signing a binary with it.
Individual developers can’t buy EV code signing certificates
The problem is that you, as an individual developer, can’t buy an EV(Extended Validation) code signing certificate, which gives you an immediate reputation from SmartScreen. Companies are only allowed to have it. Besides, it is so expensive. But it turns out that you can sign your app with a standard code signing certificate without a company. It won’t get an immediate reputation though it can accumulate the reputation across the release versions. It means that once you’ve got enough downloads, the warning doesn’t appear again for new versions until renewing the certificate.
Recently, I came across a blog post by the author of CrystalDiskMark, a popular free disk benchmark software for Windows. I found that Certum provides cheap code signing certificates for individuals. Interestingly, they offer a cloud service called SimplySign that allows you to authenticate without a USB token but with your mobile device, which is neat:

It costs €189.00/yr. Affordable. I decided to buy one. They also offer certificates for open-source developers. Cool. I was worried if it works on a virtual machine. It turns out that it works just fine on Parallels. Note that they don’t officially support virtual machines. Try it at your own risk.
Buying a certificate
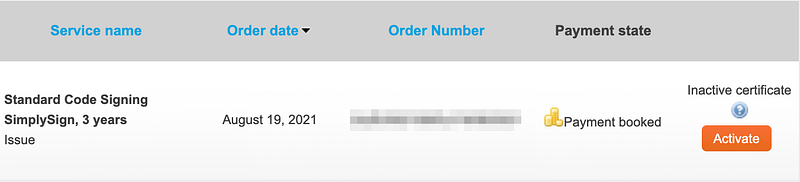
Once you bought a certificate, you should see an order item like the above on the Certum shop website. Click the “Activate” button to begin activation.
Activation wizard
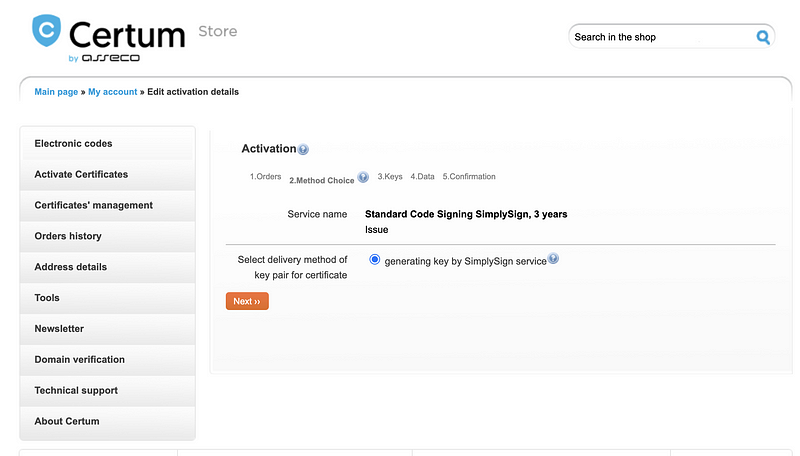
Click “Next”.
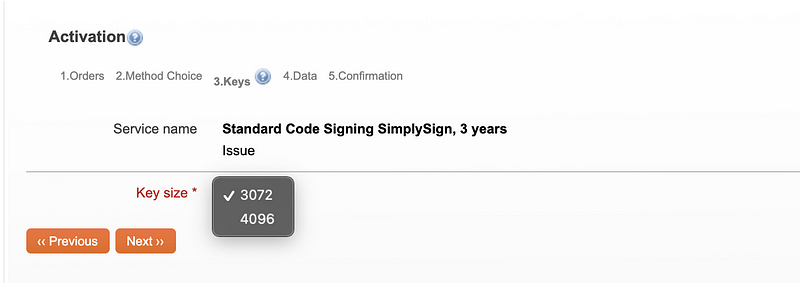
I chose a 4096-bit key length. On the next screen, input the applicant and certificate data. On the confirmation page, you’ll be asked to choose a verification method:
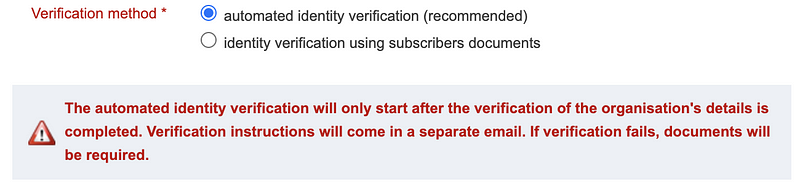
I chose “automated identity verification”.
After the submission, the status changes to “Awaiting activation” like so:

Then, your identity verification will automatically start.
Identity verification
You should get an email verification. Click “Verify” in the email:
You also get an email that explains what kind of documents you need to submit in order to verify your identity. Here is documentation about the verification process:
In my case, as a developer based in Japan, I provided the following documents:
- Passport
- Bank statement in English (e.g., ゆうちょ銀行 can export the bank statement in English)
That worked. It took only a few hours. While they are checking the documents, the status is:

Regaining access to the SimplySign service
They provide a tutorial video, which is easy to understand:
I got a 6-digit secret token and a QR code via email. I installed the SimplySign iOS app and scanned it:
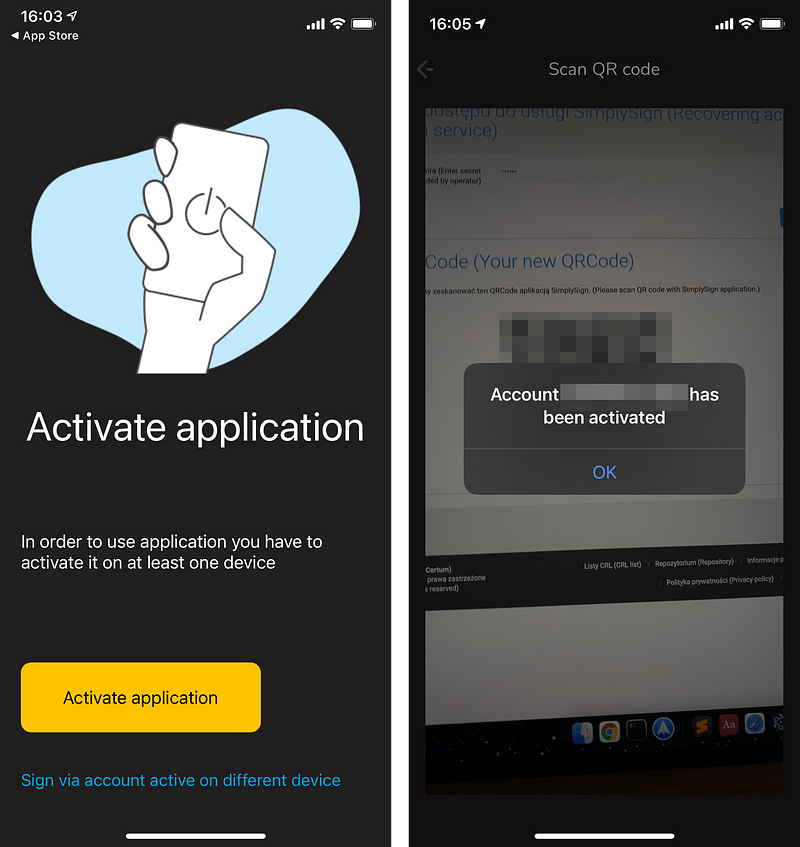
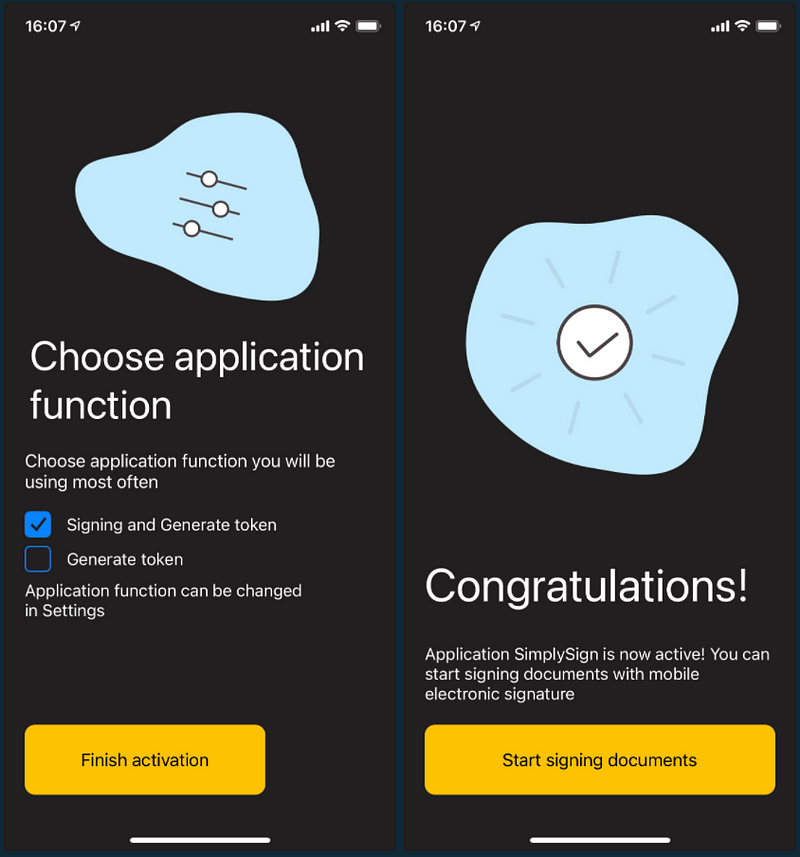
Then, the account has been activated:
The order status has been also changed:

Looks nice.
How to use the certificate
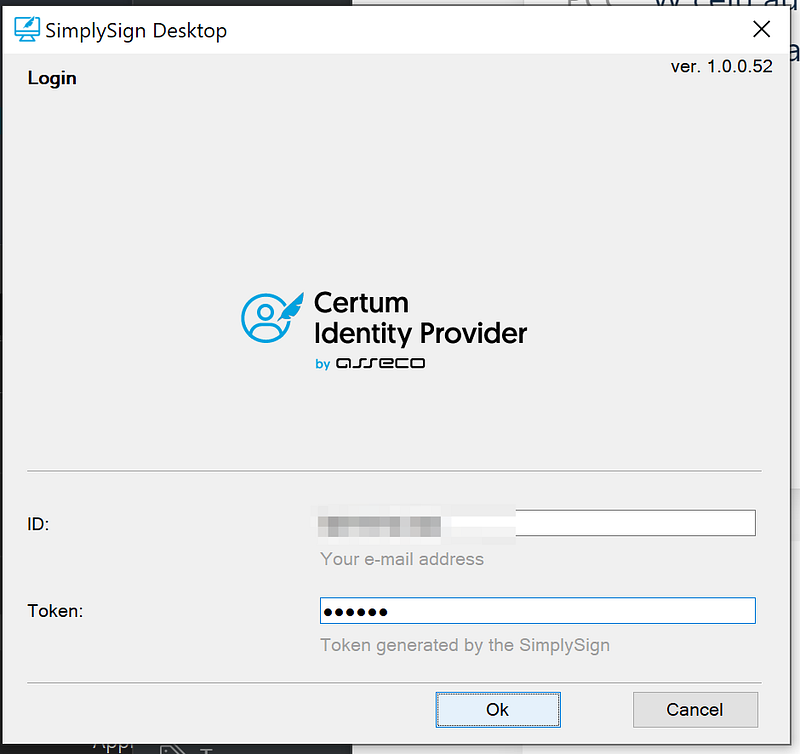
First, install SimplySign for desktop:

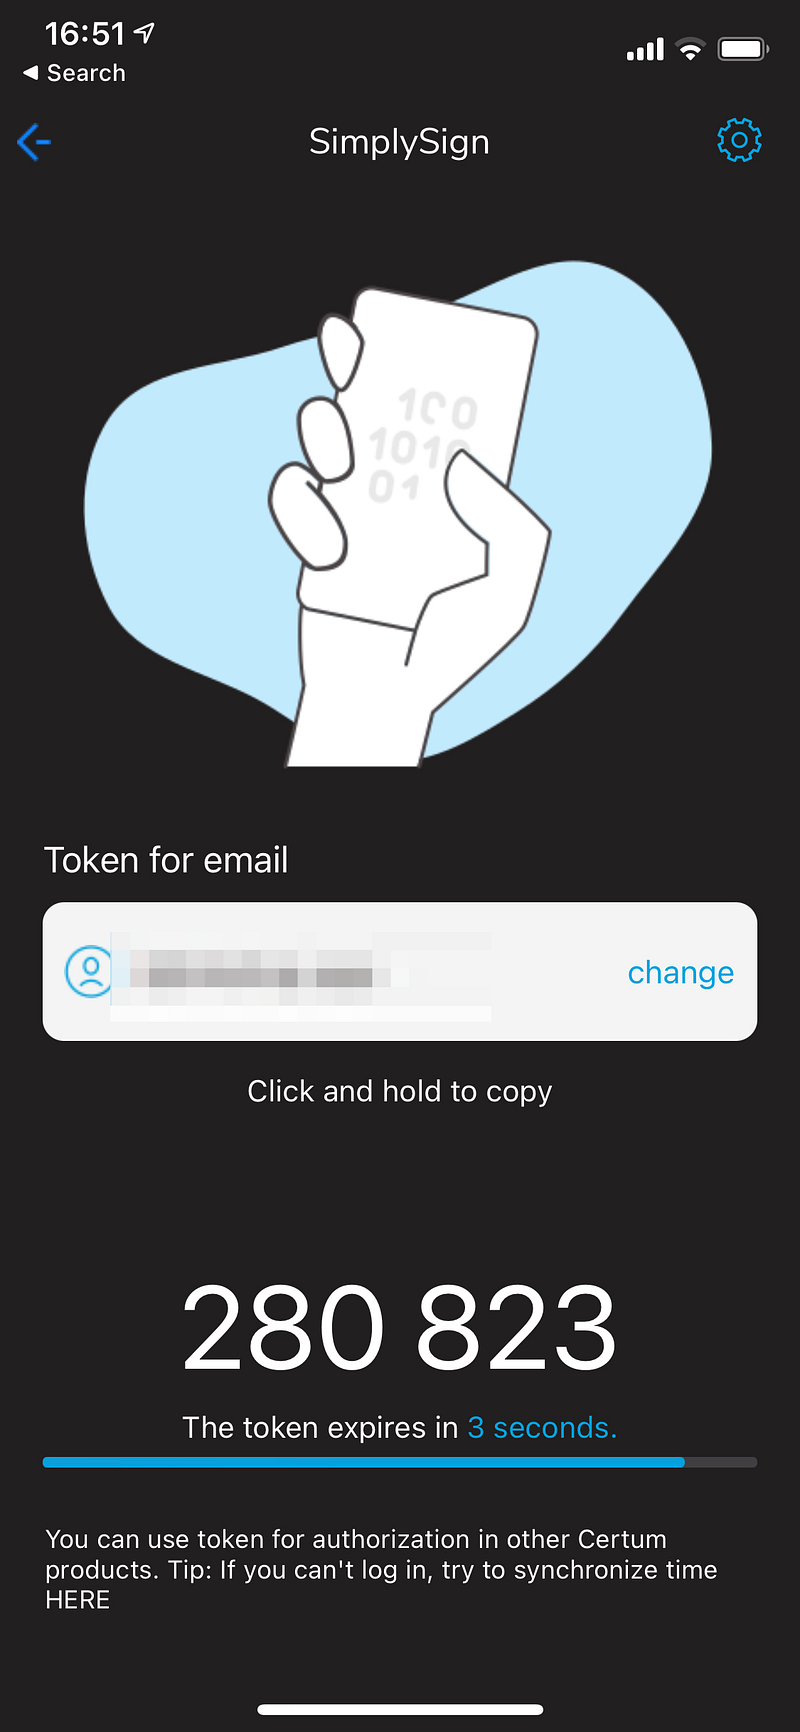
You can log in with a generated token on the mobile app:
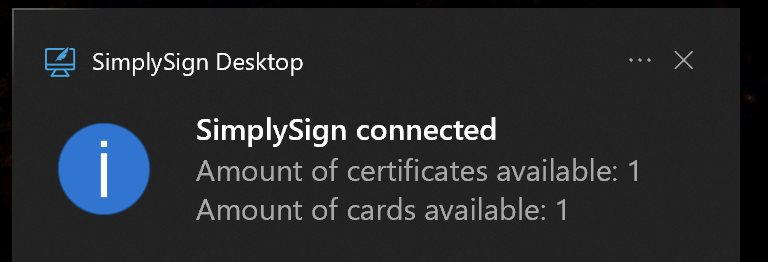
Then, you get a notification like so:
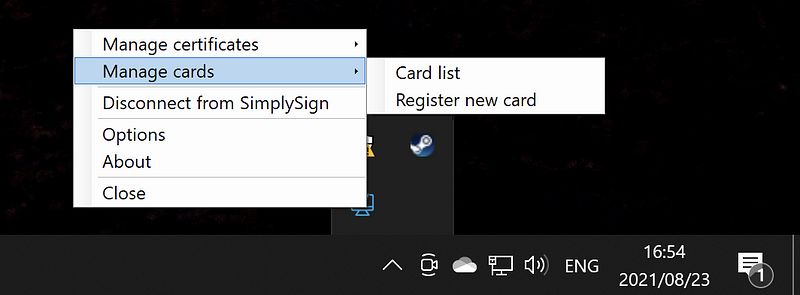
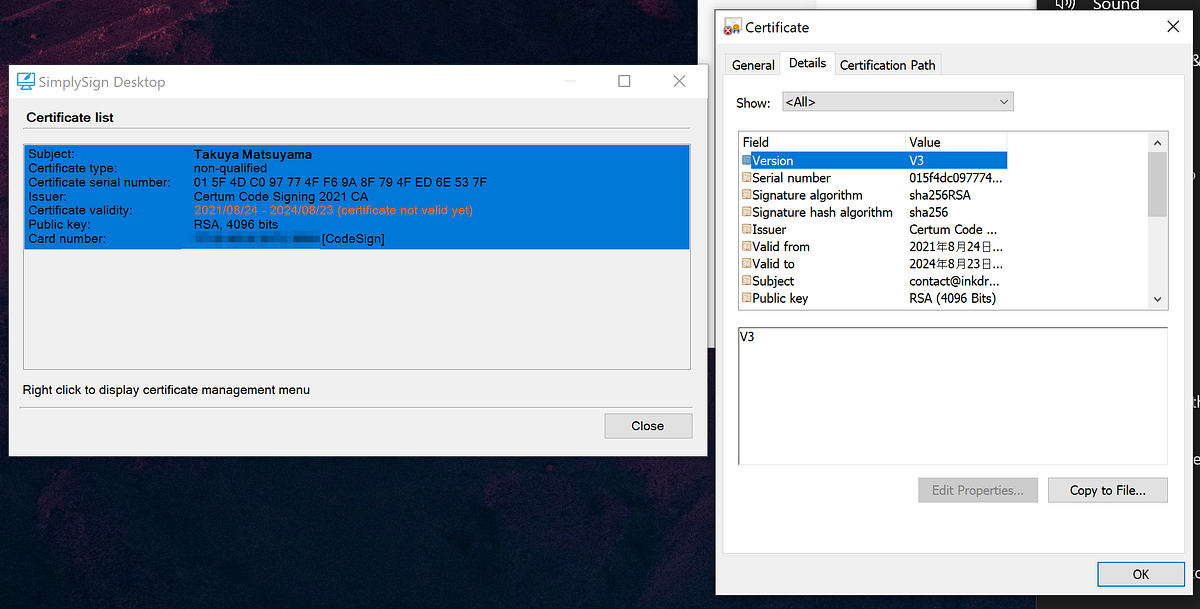
You can check your certificate by clicking the app icon on the taskbar tray:
To check if the certificate really has been installed in Windows, launch certmgr.msc , click Certificates -> Personal -> Certificates:

Sign your app
Here is the official manual on how to sign a binary file. In this tutorial, I’m going to use signtool.exe , which is bundled with Windows SDK. The command should reside in C:\Program Files (x86)\Windows Kits\10\bin\10.0.19041.0\x64. If you get the “signtool is not recognized” error, add the path to %PATH% environment variable. Run the signtool like so:❯ signtool sign /debug /n "<YOUR CERT NAME>" /t http://time.certum.pl/ /fd sha256 /v <FILENAME>
For example, I signed my Electron installer as following:❯ signtool sign /debug /n "Takuya Matsuyama" /t http://time.certum.pl/ /fd sha256 /v .\Setup.exeThe following certificates were considered:
Issued to: Takuya Matsuyama
Issued by: Certum Code Signing 2021 CA
Expires: Fri Aug 23 09:00:00 2024
SHA1 hash: ****************************************After EKU filter, 1 certs were left.
After expiry filter, 1 certs were left.
After Subject Name filter, 1 certs were left.
After Private Key filter, 1 certs were left.
The following certificate was selected:
Issued to: Takuya Matsuyama
Issued by: Certum Code Signing 2021 CA
Expires: Fri Aug 23 09:00:00 2024
SHA1 hash: ****************************************Done Adding Additional Store
Successfully signed: .\Setup.exeNumber of files successfully Signed: 1
Number of warnings: 0
Number of errors: 0
If the /n parameter was wrong, you get an error like this:SignTool Error: No certificates were found that met all the given criteria.
Now you’ve signed your app! Congrats. To verify:❯ signtool verify /pa .\Setup.exe
File: .\Setup.exe
Index Algorithm Timestamp
========================================
0 sha256 AuthenticodeSuccessfully verified: .\Setup.exe
When a user gets the SmartScreen warning, he/she can see the publisher name something like this:
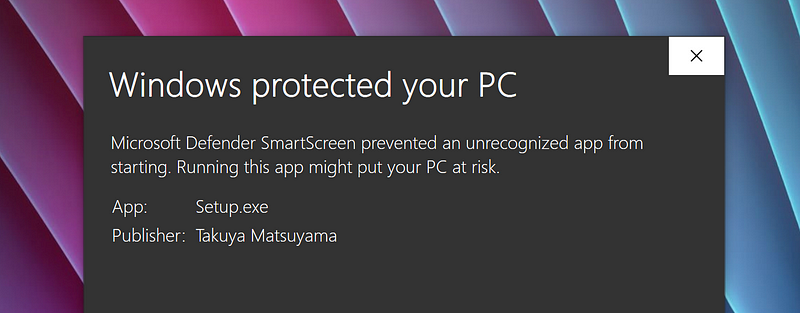
It is way better than seeing “Publisher: Unknown”. And once you’ve got enough reputation, this warning will eventually disappear.
When got a new iPhone, how to migrate
I found a guide in the documentation:
Resetting the access to the service
Resetting the access to the service consists in contacting the Certum Help line in order to submit a request for service access reset. The employee of the Certum Help line performs the access resetting process by verification of personal details of the User requesting the reset of the access to the service. The User’s data contained in their Application for qualified certificate submitted in the Certum system are verified. After correct verification, the User receives a 6-digit code, the so-called secret, from the Certum Operator. Certum sends a one time link for resetting the service access to the e-mail address, which is the User’s ID in the SimplySign System — the link is valid for 24 hours from the moment of its generation in the SimplySign system. The User receives the e-mail message, clicks on the activation link and is directed to Certum website, where they are asked to enter the 6-digit secret. Depending on the reset method, when a secret is entered and the Send button is pressed, the User obtains either the so-called QR Code called a photocode or the so-called 16-character resetting code. After receiving this data, do not close the browser but proceed to the next step of resetting the access to the service.
In a nutshell, you have to contact Certum to reset the access.
Hope that helps!
Follow me online
- Check out my app called Inkdrop — A Markdown note-taking app
- Twitter https://twitter.com/inkdrop_app
- YouTube https://www.youtube.com/devaslife
- Blog https://www.devas.life/
- Discord community https://discord.gg/QfsG5Kj
- Instagram https://instagram.com/craftzdog